
Okay, so maybe part 17 is an exaggeration, but this ceiling has taken FOREEEVVVEEERR. It seems like any project related to this ceiling takes twice as long and cost 50% more than we planned. Thankfully, we can almost close the book on the kitchen ceiling adventure! Saturday before last we started putting up bead board. I showed you this little sneak peek last week.

So installing the bead board required some trial and error. First, please note that bead board comes in sheets four feet wide by eight feet long. Second, the distance between each rafter is just over 26″, so what that means the bead board is four inches too short to span the distance of three rafters. Our initial plan was to attach the bead board sheets to the rafters, but we quickly realized that plan was going to require a ton of time cutting, a butt-load of material and create a lot of waste. Then, we moved onto plan “B”!

Ryan and my Dad came up with the idea to use 1/4″ plywood as a nailing strip. Our first thought was to cover the entire ceiling in 1/4″ plywood, so off to Lowe’s we went. Well, Ryan went. I think I was scraping wallpaper or putting up bead board. Anyways, after installing the first piece of plywood we realized that plan also sucked! Even though it was only a 1/4″ thick, it was still pretty darn heavy to be hoisting above your head. Moving onto plan “C” – plywood slats! Why we didn’t think of this to begin with is beyond me! Duh?!

I even got in on the bead board action. Note to self – always have three people working on a project requiring work on a ladder and above your head! Four people if you want a photographer.

Nothing better than a Saturday with greasy hair and dirty clothes! 🙂

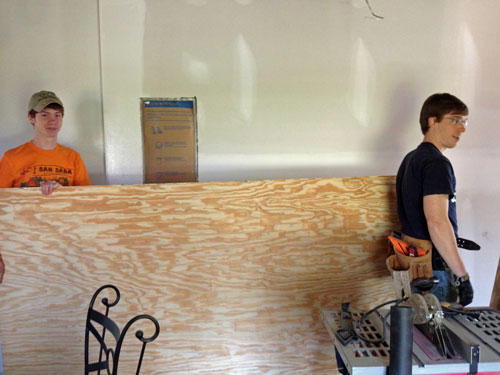
My brother’s long arms were super handy with this project! I am pretty sure his wing span is like 8′ feet or something.
Anytime you have to go through a plan A, plan B, and plan C, you aren’t going to finish in one day! Ha. Ryan, with help of my cousin, finished up the kitchen ceiling this past Saturday.
Last Saturday I called in the troupes to help prime the dry wall. I can happily say we were able to get 90% of the dry wall primed! Wahoo!! I will have pictures soon, I promise! What in your life could be more exciting than freshly primed walls?! 😉
Ryan and I also spent last week working on installing cement board in the master bathroom upstairs.


I can now officially tell you I LOATHE cement board. More specifically, cement board screws. Someone should tell the person who invented cement board screws that a square is the next closest shape to a circle and screws WILL pop out. All. The. Time.

So that is a nutshell of what we have been up to this past week or so. What have you guys been up to? Anyone installed bead board before? Cement board? I don’t mind the bead board, but the cement board I could live without!
Peace.
Brittney

Wood slats = brilliant! Way to figure out a way that totally works. The rock looks wonderful and if anyone knows how exciting primed dry wall is, it’s me. Congrats. Cement board does suck and it’s so dang heavy. Those plastic weird screws drove us crazy. We went through tons of them.
Thanks! Those cement board screws about did me in. I was really close to waiving a white flag and letting Ryan finish it…
yeah to kitchen ceiling!! One more thing off the to-do-list!! 🙂